The IDE Interface
Document Metadata
Category: Development → Anvil → IDE
Audience: Developers, Solution Engineers, Administrators, Technical Teams
Difficulty: Beginner to Intermediate
Time Required: 15–20 minutes
Prerequisites: Access to a ConnexCS account, an Anvil project, and familiarity with the Anvil IDE.
Related Topics: Document Guide — documentation standards, Getting Started — signing in and project selection, ScriptForge — backend scripting, Query Builder — SQL development, Anvil Apps — frontend development, CX Terminal — command-line tools, ConnexCS Assistant — AI-powered development assistance.
Next Steps: Explore the workspace, navigate the project structure, configure the development environment, use the integrated AI assistant, run and debug applications, manage file history, and customize the IDE layout to suit your workflow.
Overview
The Anvil IDE Interface provides a complete development workspace for building, debugging, and managing Anvil applications.
It combines file management, source control, integrated debugging, AI-assisted development, project history, and workspace management within a single interface.
Understanding the purpose of each panel, tool, and workspace component enables developers to navigate projects efficiently and make full use of the development environment.
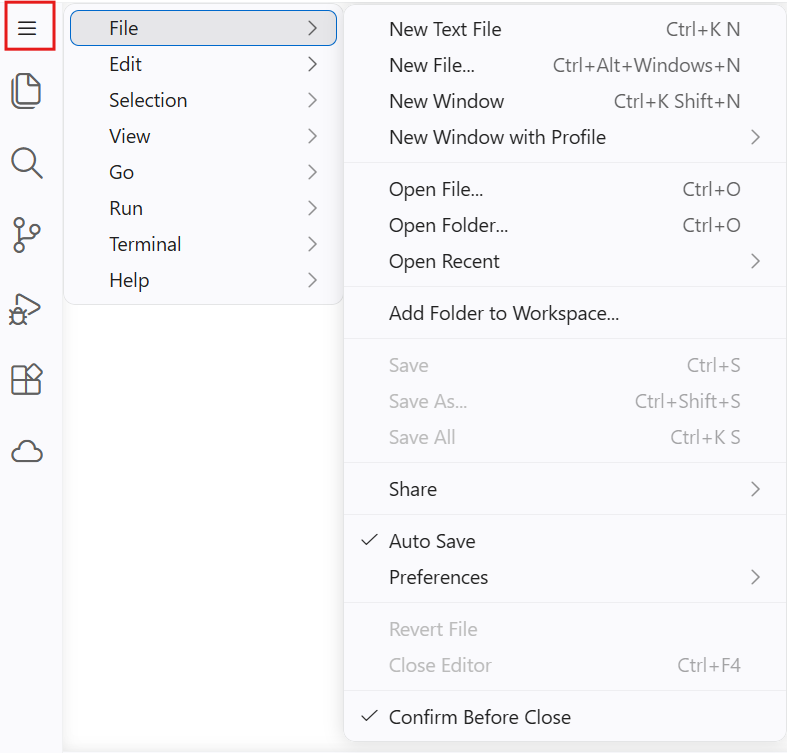
Activity Bar (left edge)
| Option | Description |
|---|---|
| Menu | Opens the main application menu, providing access to file management, editing tools, navigation, terminal, preferences, and other settings |
| File | Contains options for creating, opening, saving, and managing files, folders, workspaces, and application preferences |
| Edit | Provides standard editing actions such as Undo, Redo, Cut, Copy, Paste, Find, and Replace |
| Selection | Includes commands for selecting text, expanding or shrinking selections, and performing multi-cursor operations |
| View | Lets you customize the editor layout, toggle panels, zoom, and control the appearance of the workspace |
| Go | Provides quick navigation to files, symbols, line numbers, definitions, and other locations within the workspace |
| Run | Contains options to run, debug, or manage the execution of applications and scripts |
| Terminal | Opens and manages integrated terminal sessions for executing command-line operations |
| Help | Provides access to documentation, keyboard shortcuts, release notes, and application support resources |
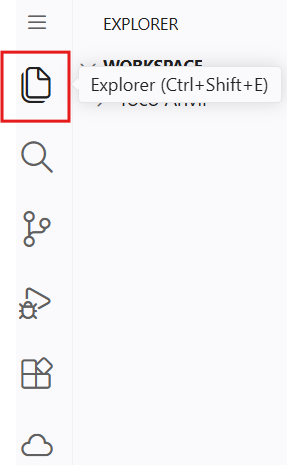
Explorer
Opens the Explorer view, where you can browse, create, rename, move, and delete files and folders within your workspace. It serves as the primary file management panel for your project.
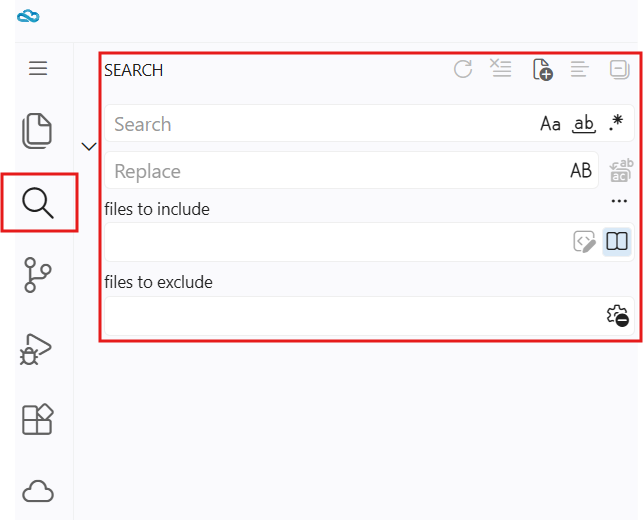
Search
- Opens the Search view, allowing you to search and replace text across the entire workspace.
- You can narrow the search by specifying Files to Include or Files to Exclude, making it easier to search within specific files or folders while ignoring others.
- Advanced options such as Match Case, Whole Word, and Regular Expression are also available to refine search results.
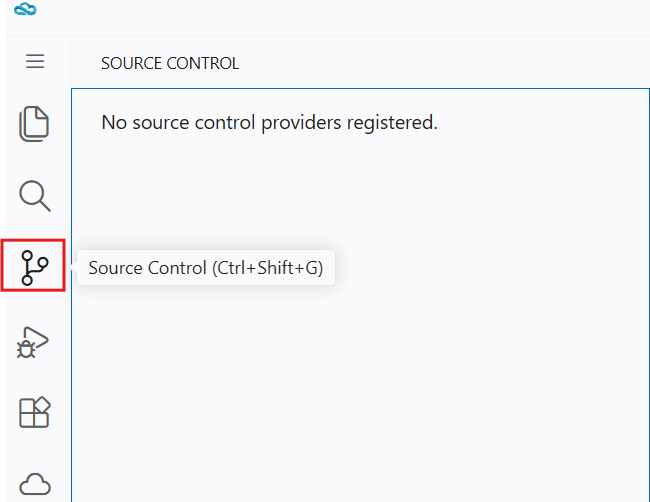
Source Control
Opens the Source Control view, where you can manage version-controlled files and track changes in your workspace.
It allows you to view modified files, stage and commit changes, review differences, and synchronize your project with a supported source control provider such as Git.
If no provider is configured, a message indicating that no source control providers are registered is displayed.
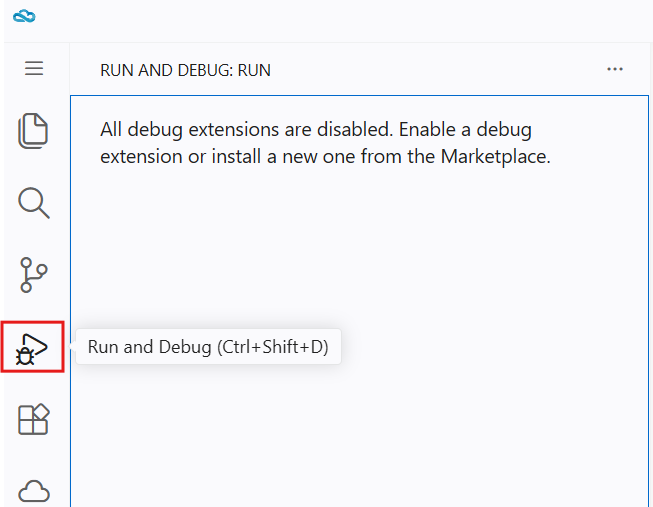
Run and Debug
Opens the Run and Debug view, where you can run, test, and debug your applications.
It provides tools for launching programs, setting breakpoints, inspecting variables, and troubleshooting code.
If no debug extension is installed or enabled, a message prompting you to enable or install one is displayed.
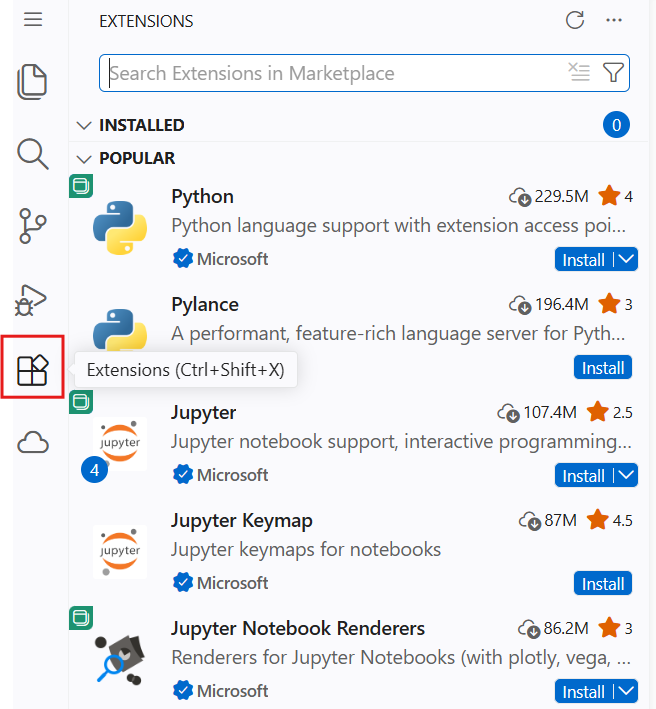
Extensions
Opens the Extensions view, where you can browse, install, update, enable, disable, and manage extensions from the Visual Studio Code Marketplace.
Extensions add support for additional programming languages, debugging tools, themes, integrations, and other features to enhance your development experience.
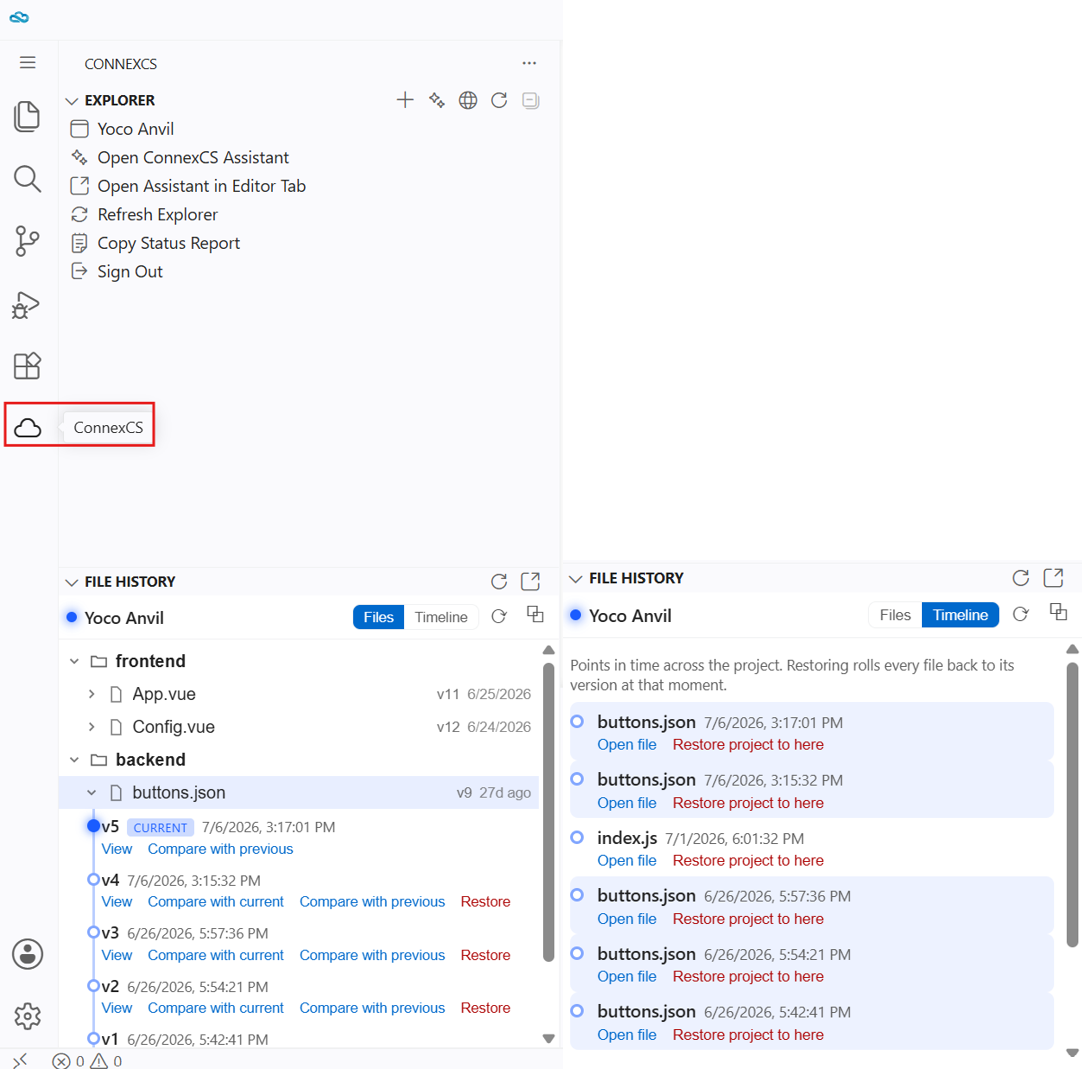
ConnexCS Sidebar
Shows your sign-in status, active project name, and quick-action buttons. When you are signed in it displays:
| Section | Description |
|---|---|
| Explorer | Displays the project structure, including files and folders in your workspace. It allows you to browse, open, create, rename, move, and delete files and directories. The Explorer also provides quick access to ConnexCS tools such as Open ConnexCS Assistant, Open Assistant in Editor Tab, Refresh Explorer, Copy Status Report, and Sign Out |
| File History | Tracks changes made to files in your project and maintains previous versions. You can switch between the Files view to see version history for individual files or the Timeline view to view project-wide changes in chronological order. It also allows you to compare versions, restore previous file revisions, or roll back the entire project to an earlier point in time |
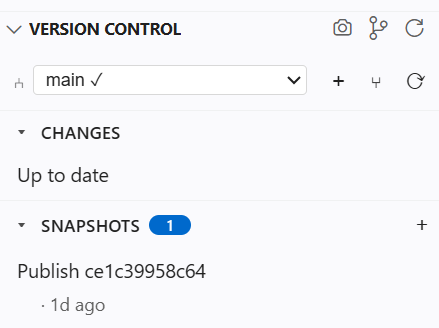
Version Control
| Icon / Element | Function |
|---|---|
| 📷 Camera | Captures a new snapshot of the project's current state |
| ⑂ Branch/fork icon | Creates a new branch |
| ↻ Refresh | Refreshes/re-syncs the whole panel with the current project state |
| "main ✓" dropdown | Shows the active branch name with a checkmark confirming it's selected; click to switch branches |
| + (plus) | Creates a new branch |
| ⊍ Pin-like icon | Merge a branch into current |
| ↻ Refresh | Refreshes just the branch selector/status |
| Changes | list any uncommitted changes/edits in the project |
| Snapshots section | A snapshot is a manually or automatically created save point that captures the full state of the project at a specific moment in time |
| Blue "1" badge | |
| + (plus, far right) | |
| "Publish ce1c39958c64" is the Snapshot entry | |
| "· 1d ago"- Relative timestamp showing when the snapshot was taken |
Create Project
The Create Project option allows you to create new Anvil project. 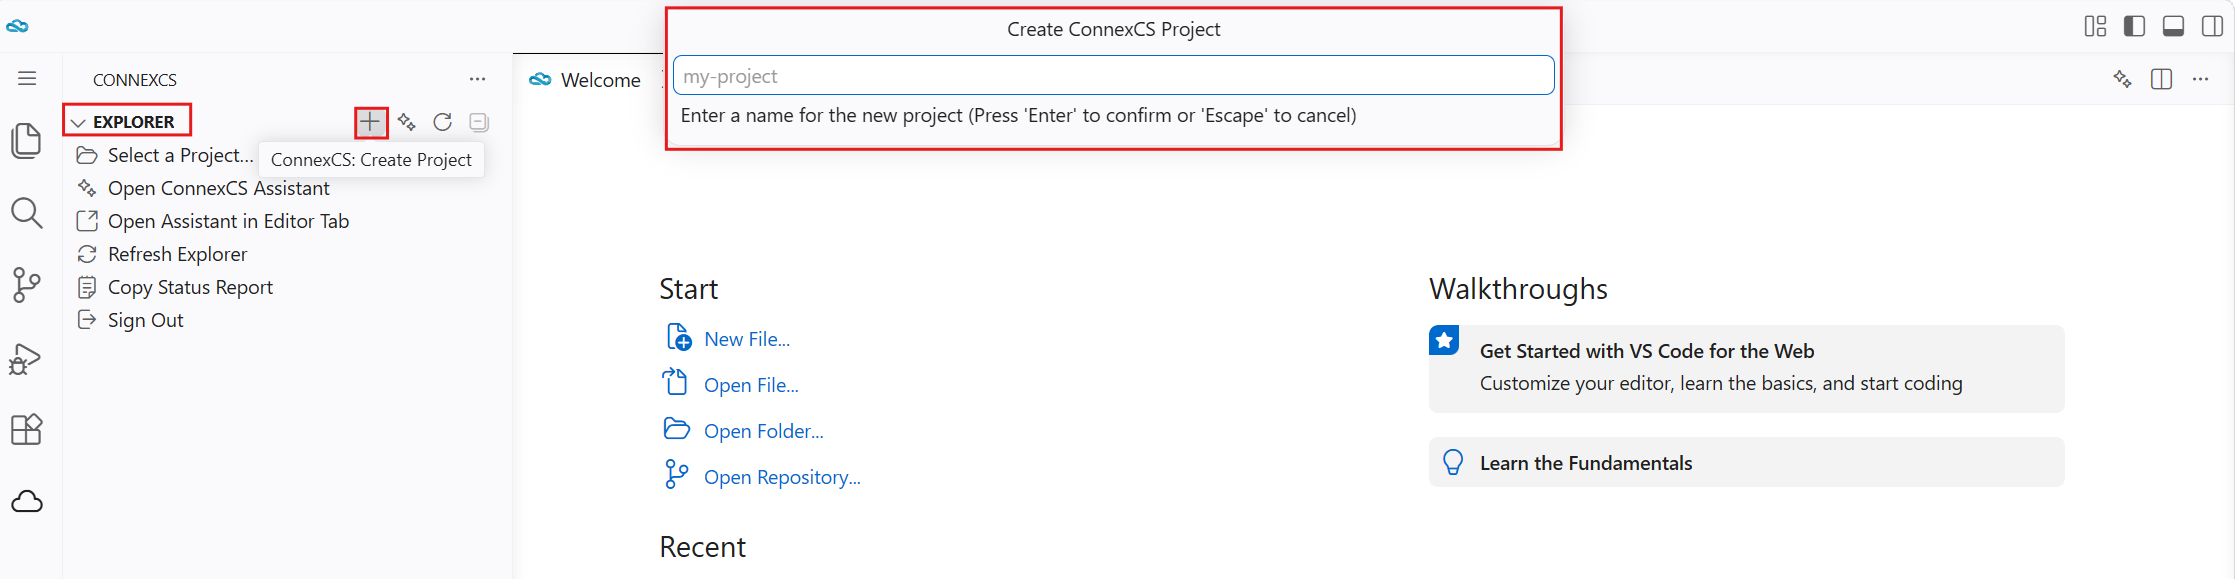
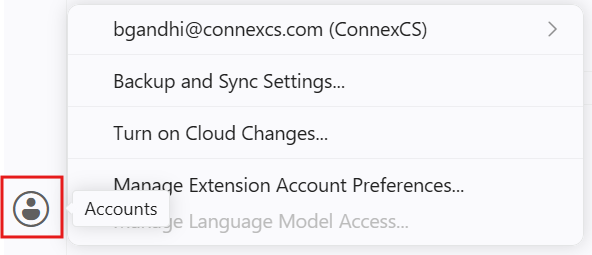
Accounts
Opens the Accounts menu, where you can manage your signed-in account and synchronization settings.
From this menu, you can view your current account, configure Backup and Sync settings, enable Cloud Changes, and manage account preferences for extensions and other supported services.
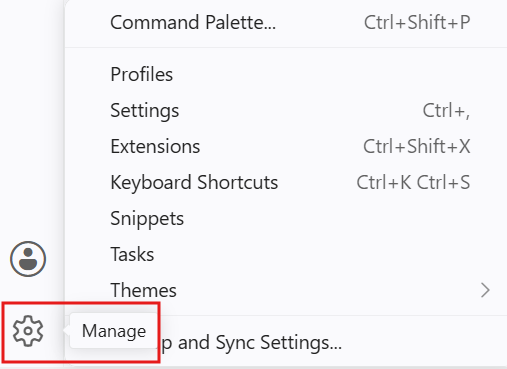
Manage
Opens the Manage menu, where you can access and configure editor settings and preferences.
From here, you can open the Command Palette, manage Profiles, Settings, Extensions, Keyboard Shortcuts, Snippets, Tasks, and Themes, as well as configure Backup and Sync and other application preferences.
Outline and Timeline
| Section | Description |
|---|---|
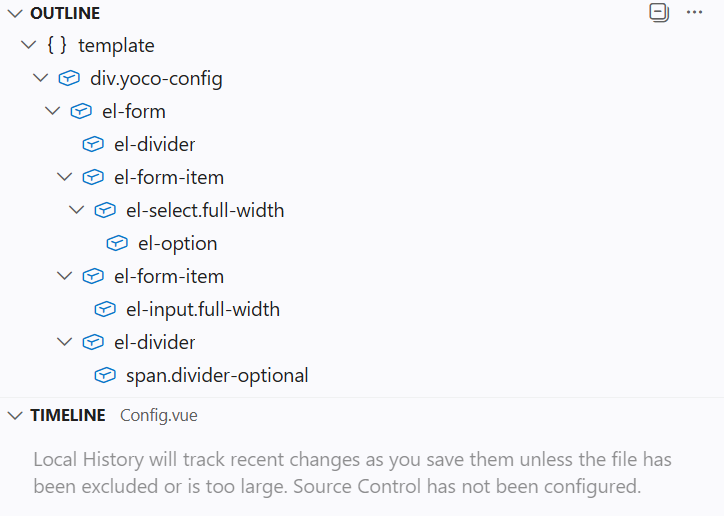
| Outline | Displays the structure of the currently active file by listing its symbols, such as classes, functions, methods, variables, and headings. This allows you to quickly navigate to different sections of the file. If the active file does not support outlines, no information is displayed |
| Timeline | Shows the history of the currently active file, including changes, commits, or saved versions provided by supported source control or extensions. This helps you review previous modifications and track the file's evolution over time. If timeline information is unavailable, the panel remains empty |
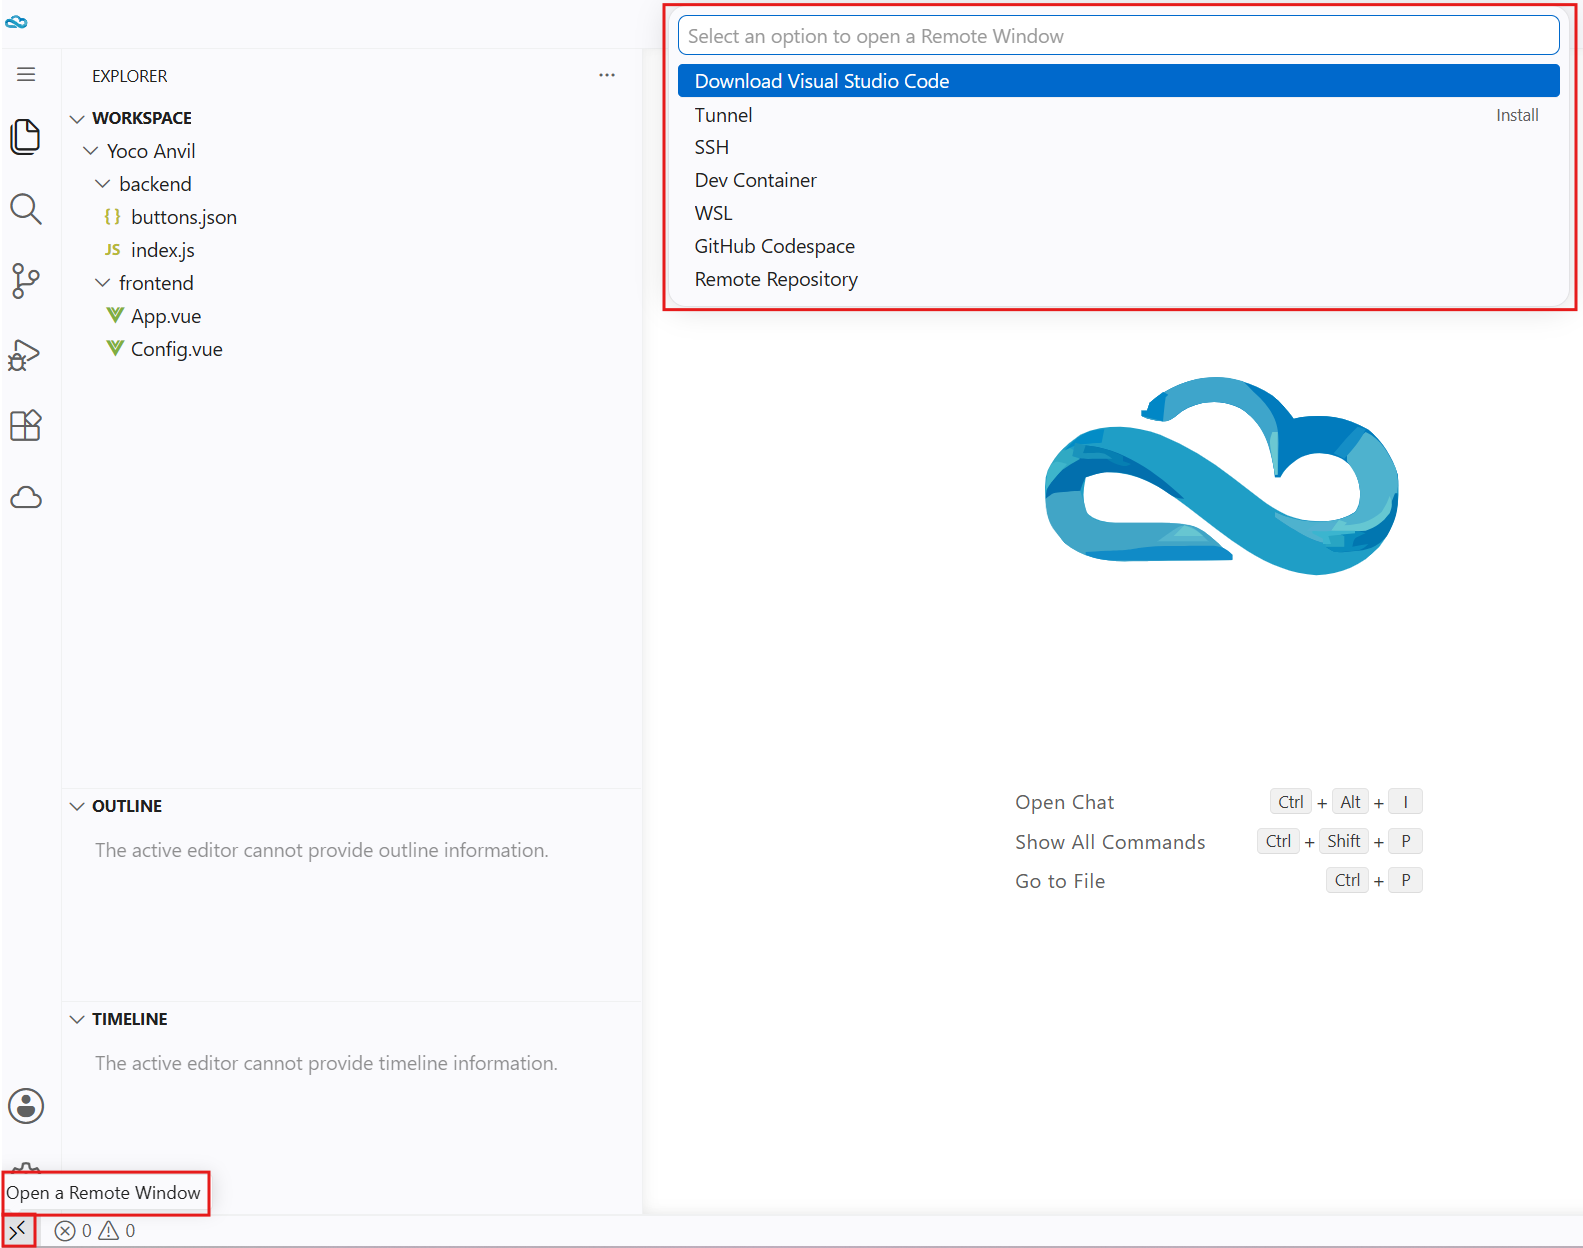
Open a Remote Window
Opens the Remote Development menu, allowing you to connect to and work in remote environments directly from the editor. You can connect using SSH, Dev Containers, WSL, GitHub Codespaces, or Remote Repositories. If a required extension is not installed, you will be prompted to install it before connecting.
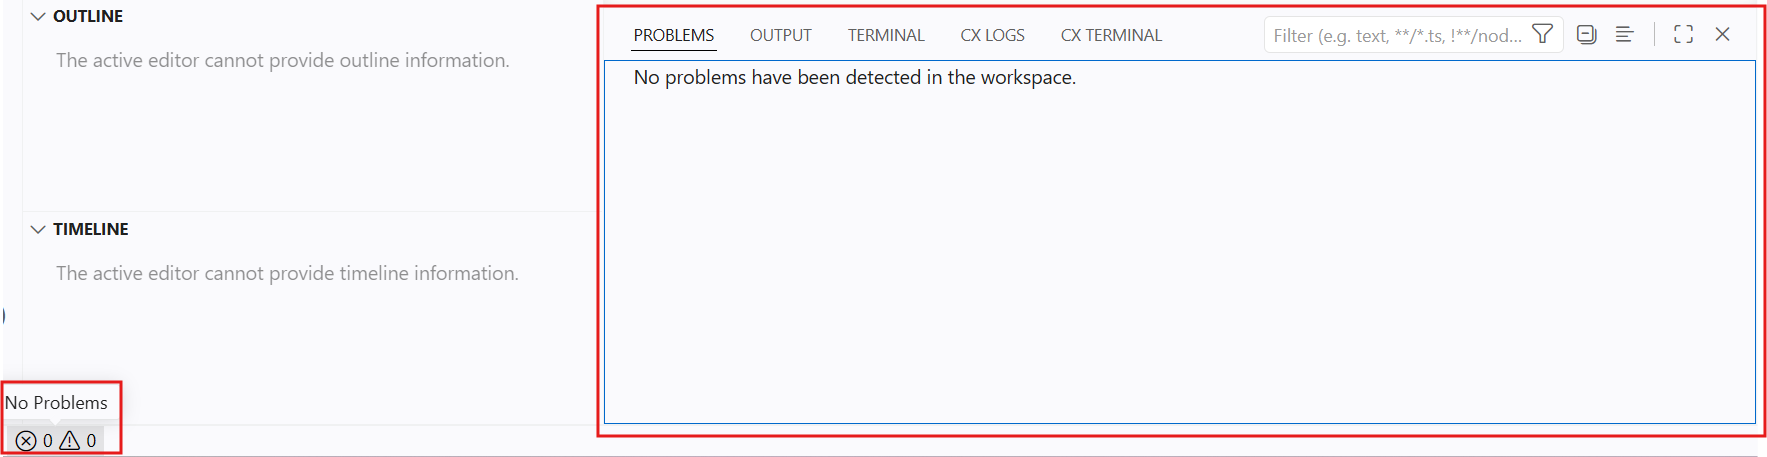
Problems Panel
| Section | Description |
|---|---|
| Problems | Displays errors, warnings, and informational messages detected in the current workspace. Selecting an issue navigates directly to the corresponding file and line, making it easier to identify and resolve problems. When no issues are found, the panel displays "No problems have been detected in the workspace." |
| Output | Displays output generated by the editor, extensions, build tasks, and other tools. Use the drop-down menu to switch between different output sources |
| Terminal | Opens the integrated terminal, allowing you to execute command-line operations without leaving the editor. Multiple terminal sessions can be created and managed |
| CX Logs | Displays logs generated by ConnexCS extensions and services. These logs help monitor extension activity and troubleshoot issues related to ConnexCS features |
| CX Terminal | Provides a ConnexCS-specific terminal for running supported commands and interacting with ConnexCS development tools directly from the editor |
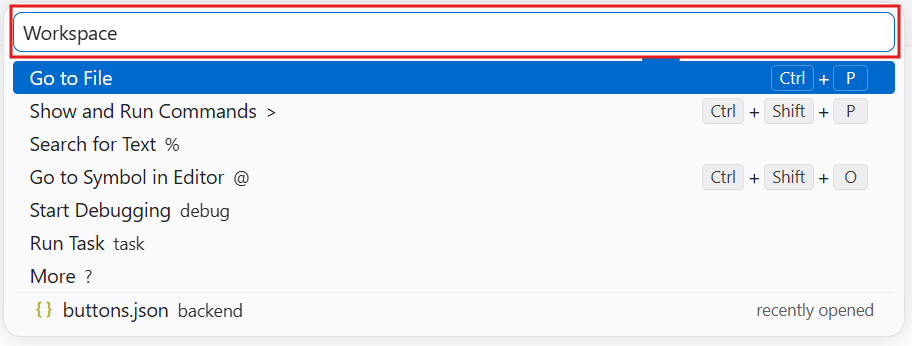
Workspace
Represents the current project or collection of folders opened in the editor.
The Workspace search box allows you to quickly find files, run commands, search text, navigate to symbols, start debugging, and perform other workspace-related actions without manually browsing the project.
Chat
Opens the chat panel, where you can interact with the AI assistant to get help with coding, explanations, debugging, code generation, documentation, and other development tasks.
Enter your request in the input box, and the assistant will provide context-aware responses based on your project. 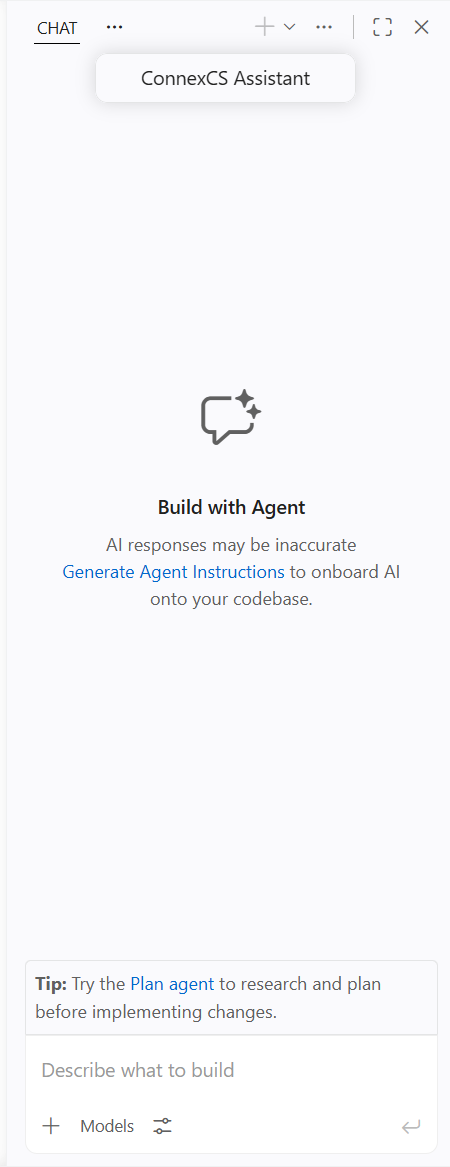
Generate Agent Instructions: Creates AI agent instructions to help the assistant better understand your codebase and provide more relevant responses.+(Add Context): Allows you to attach additional context to your prompt, enabling the AI assistant to provide more accurate and relevant responses. You can include Files & Folders, Instructions, Problems, Symbols, Sessions, or Tools from your workspace. Use the search bar to quickly locate and attach the required context before submitting your prompt.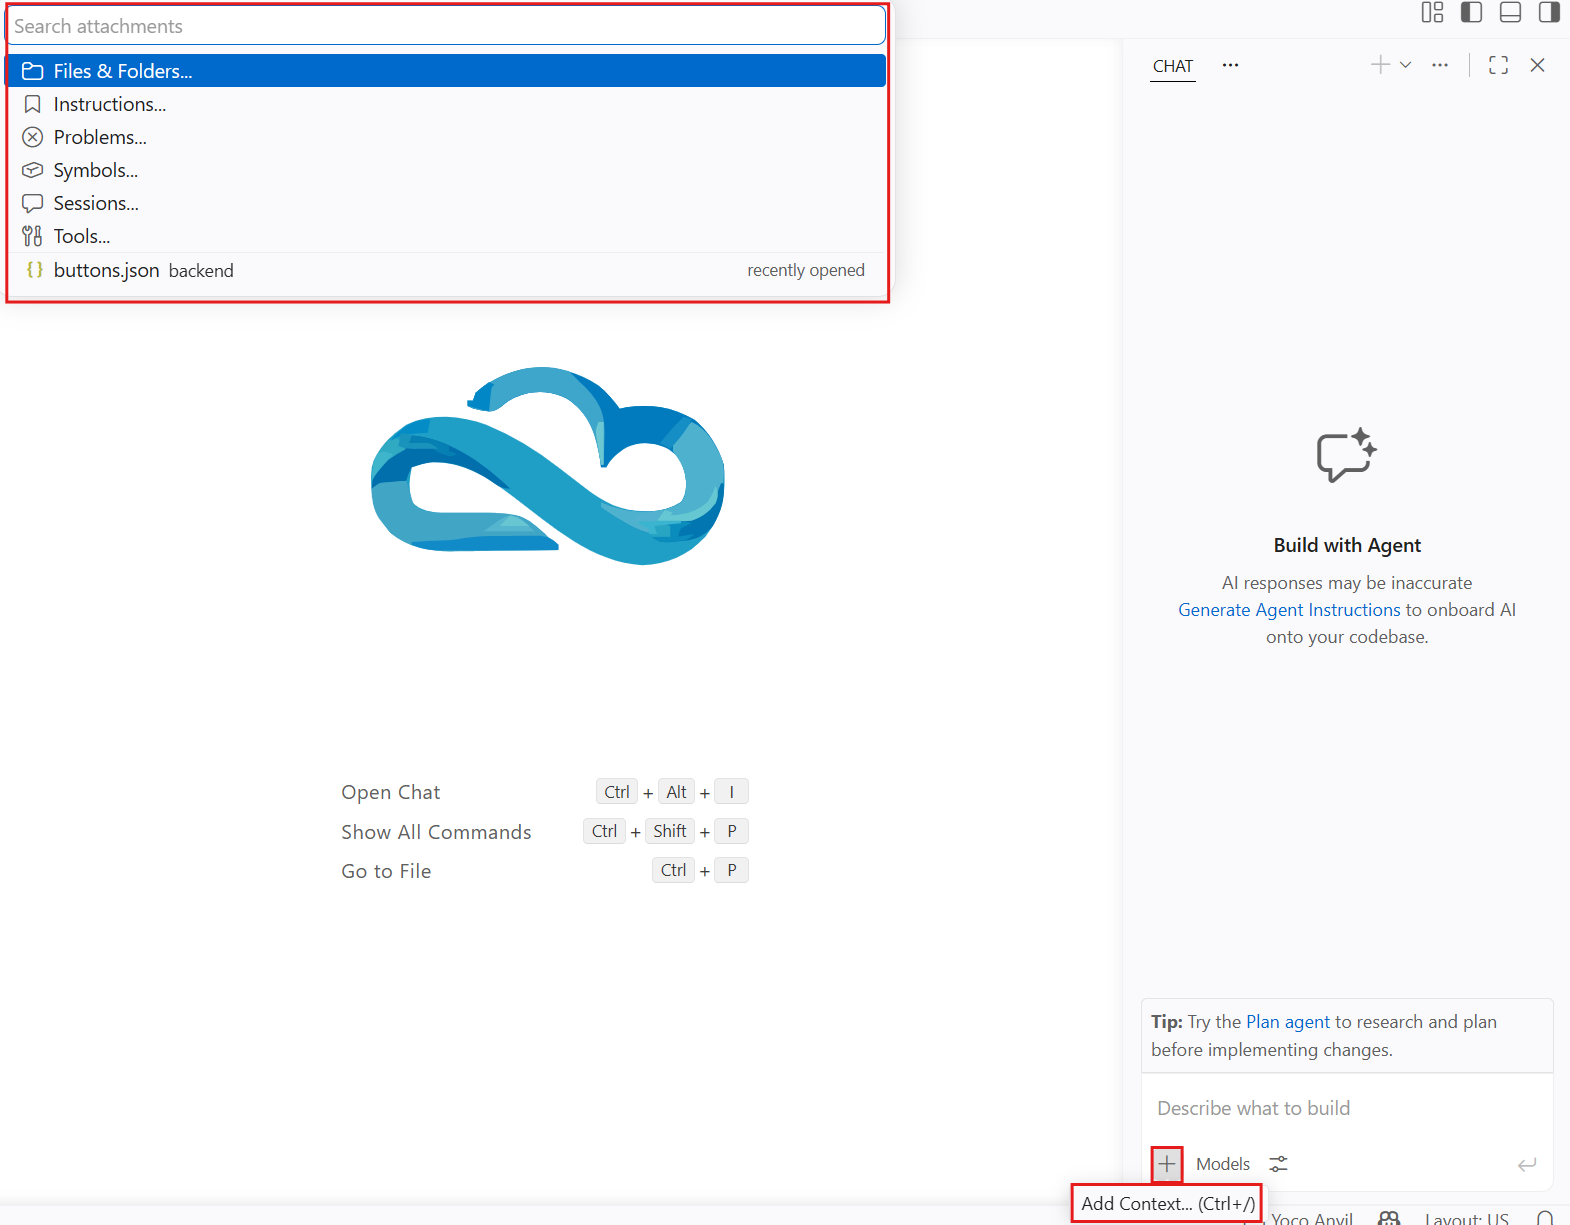
Models: Allows you to select or switch the AI model used by the assistant.-
Configure Tools: Allows you to select which tools the AI assistant can access during chat sessions. Enabling only the required tools helps the assistant perform tasks more effectively while limiting access to unnecessary capabilities. The selected tools are applied globally to all chat sessions that use the default agent.Tool Description Agent Enables the assistant to delegate tasks to specialized AI agents when appropriate Execute Allows the assistant to execute code and applications on your local machine, subject to your approval and configuration Read Grants the assistant permission to read files and folders within the current workspace to provide context-aware responses Todo Enables the assistant to create, manage, and track task lists for planning and organizing work VS Code Allows the assistant to interact with supported Visual Studio Code features, such as opening files, navigating the workspace, and performing editor-related actions 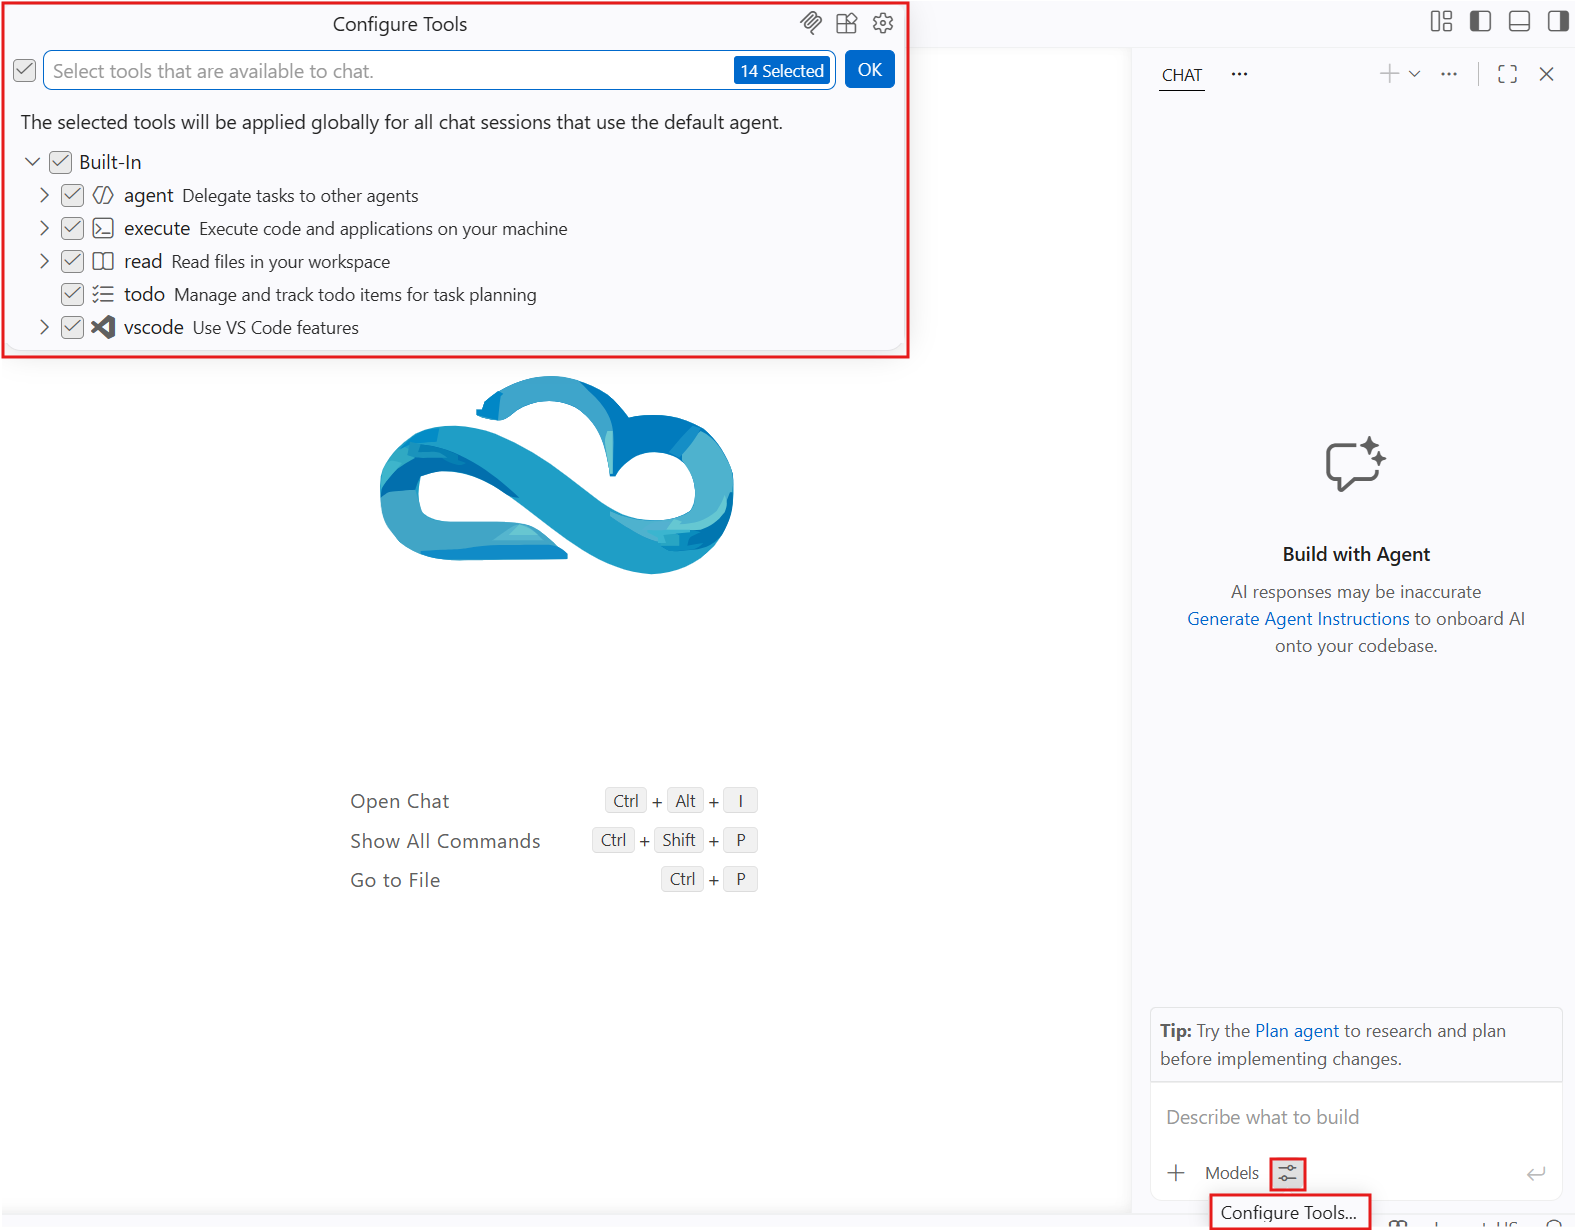
-
New Chat:Option Description New Chat Starts a new chat session with the currently selected AI assistant New Chat Editor Opens a new chat session in a dedicated editor tab, allowing you to interact with the AI assistant alongside your code New Chat Window Opens a separate chat window for interacting with the AI assistant independently of the current workspace New Background Agent Creates a new AI agent that runs tasks in the background, allowing you to continue working while long-running operations are processed independently New Cloud Agent Creates a cloud-based AI agent that executes supported tasks using cloud resources instead of your local machine New Codex Agent Creates a specialized coding agent designed to assist with software development tasks such as writing code, debugging, refactoring, explaining code, and implementing features -
Views and More Actions:Option Description Undo Last Edit Reverts the most recent change made in the current chat or editor. This option is available only when there is an action that can be undone Redo Last Edit Restores the last action that was undone, allowing you to reapply the most recent change Move Chat into Editor Area Moves the chat panel from the sidebar into the main editor area, allowing you to work with the chat in a tab alongside your files Move Chat into New Window Opens the current chat in a separate window, providing more workspace for coding and multitasking Show Voice Transcripts Displays transcripts of voice-based conversations, allowing you to review spoken interactions as text Show View by Default Automatically opens the chat view when the editor starts or when a workspace is opened, making the AI assistant readily available -
ConnexCS Assistant: Click here for more full details.
Status Bar
The bottom bar shows your active project name. Click it to switch projects. 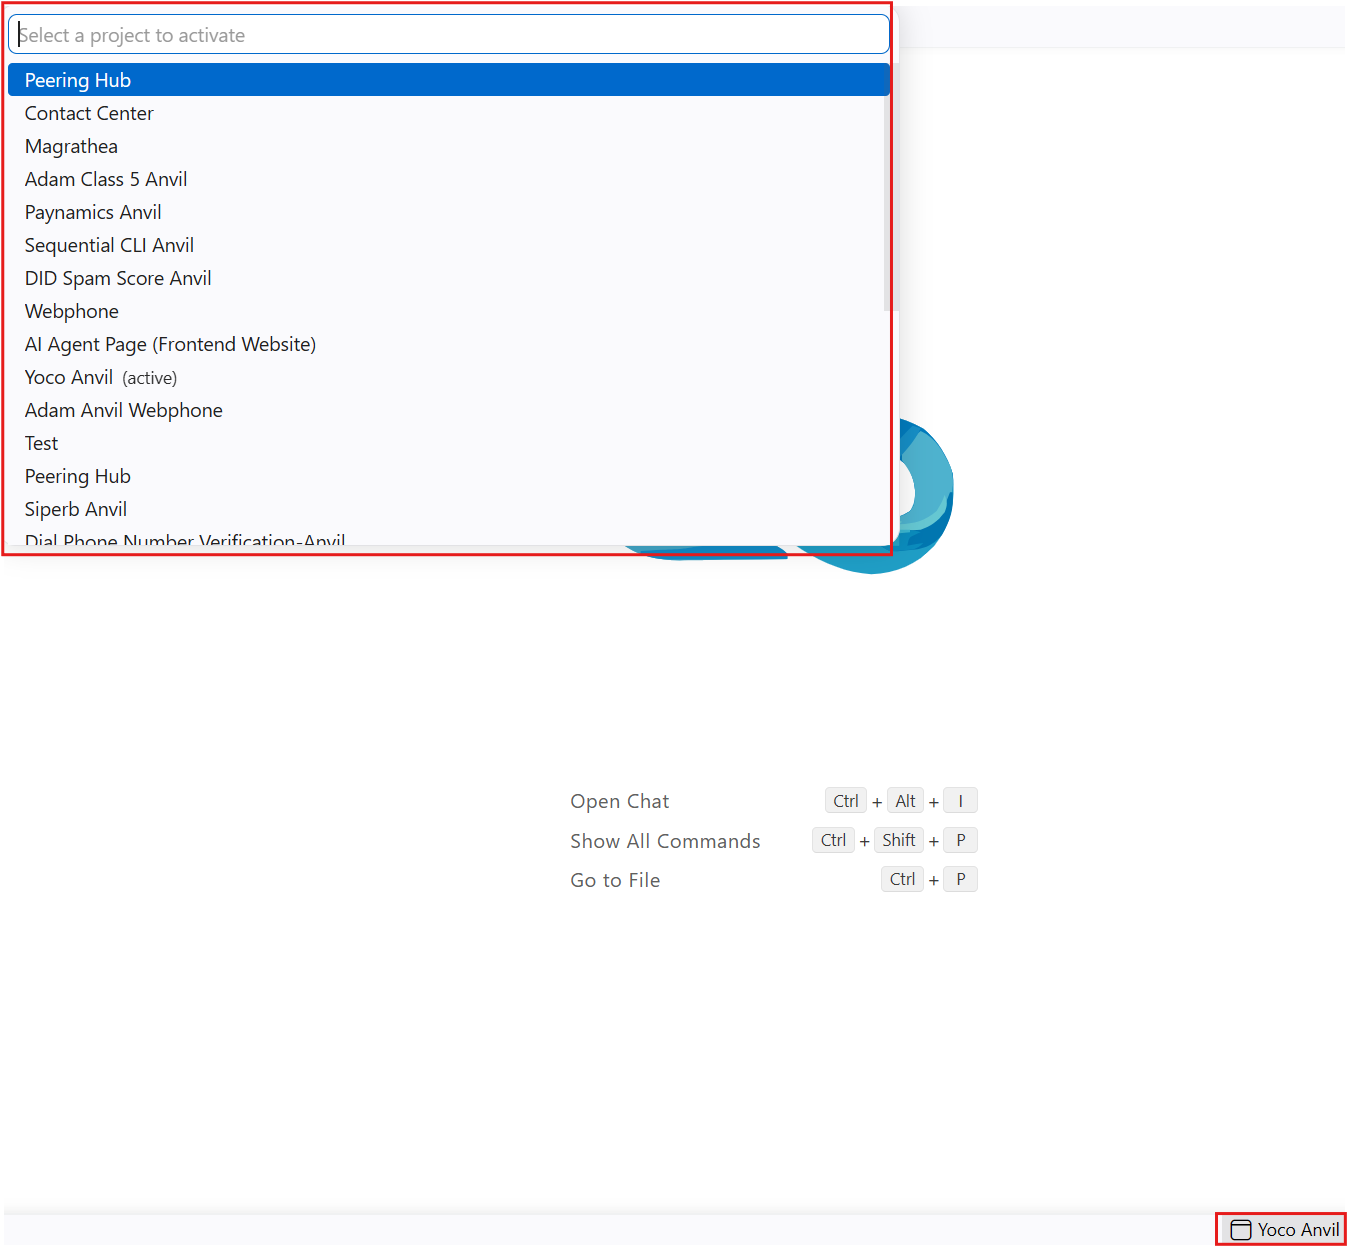
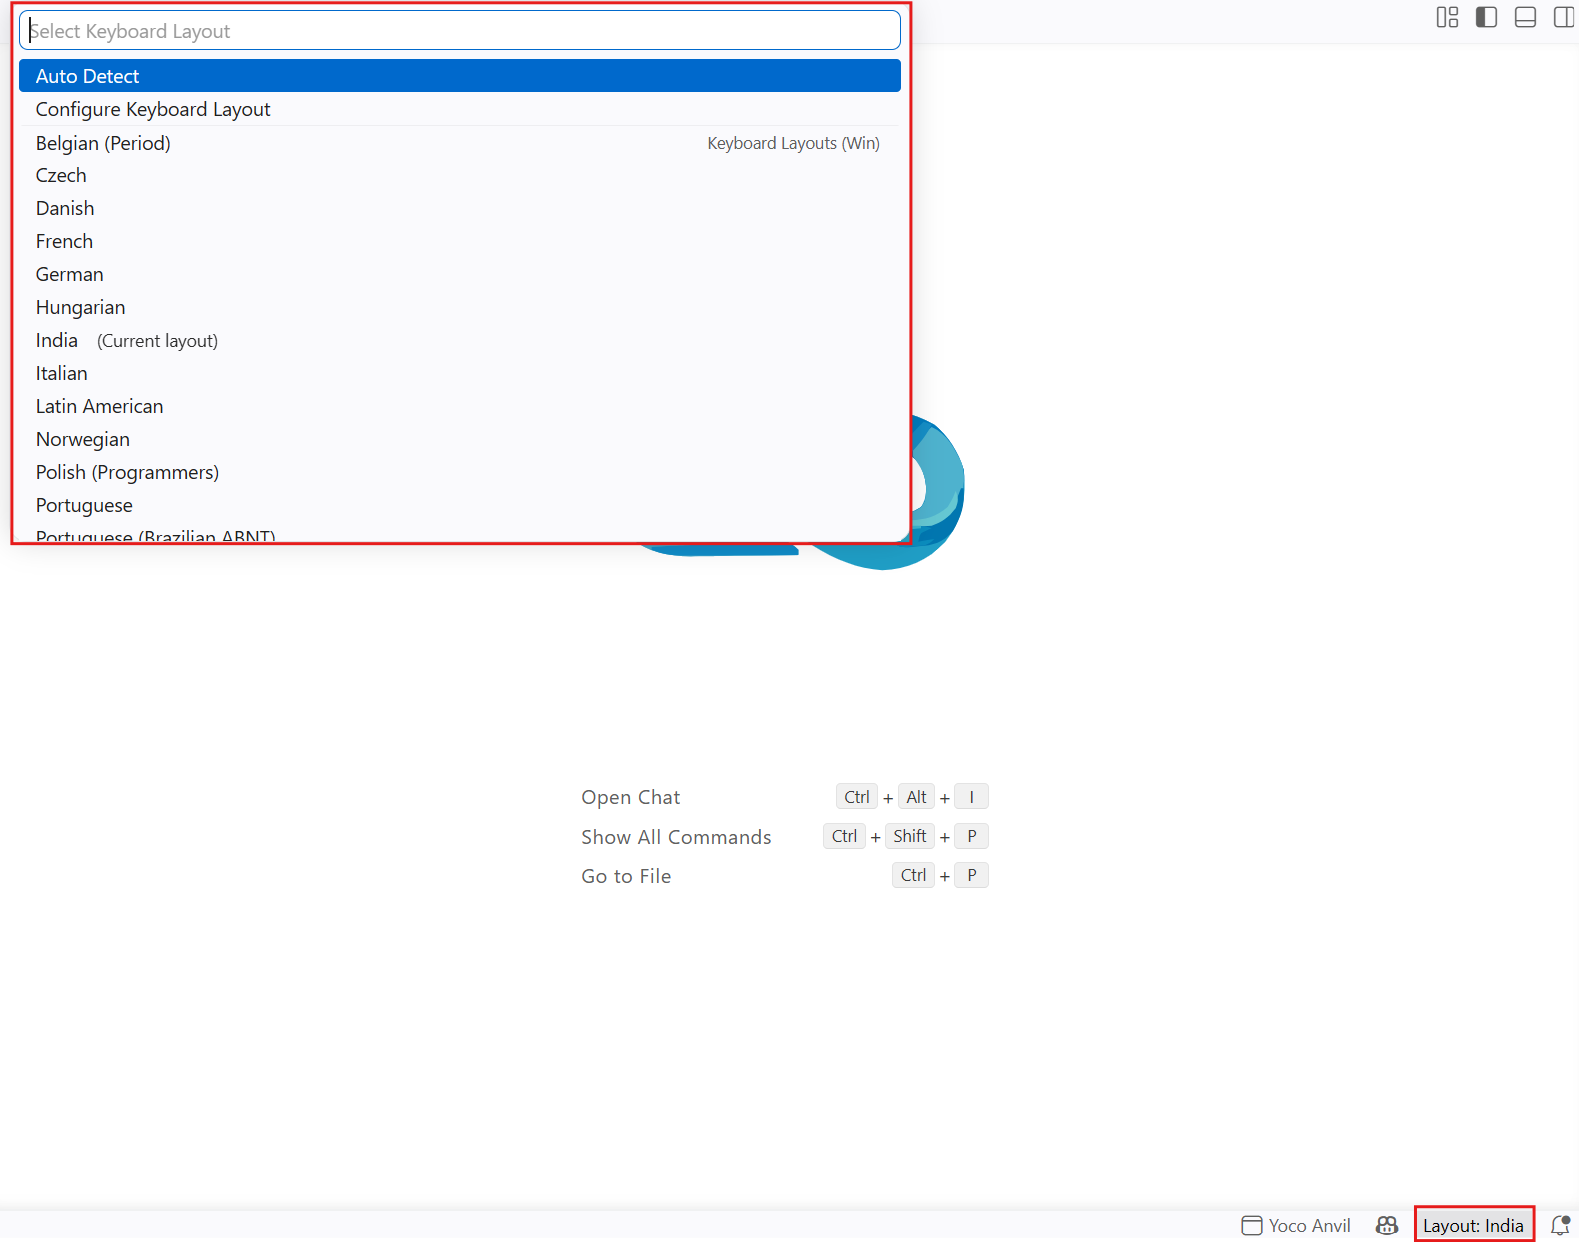
Layout
| Field | Description |
|---|---|
| Select Keyboard Layout | Allows you to search for and select the keyboard layout used by the editor. The selected layout ensures that keyboard shortcuts and key mappings match your physical keyboard |
| Auto Detect | Automatically detects and applies the keyboard layout based on your operating system and connected keyboard |
| Configure Keyboard Layout | Opens the keyboard layout configuration settings, allowing you to manually select or change the active keyboard layout |
| Keyboard Layout List | Displays all available keyboard layouts (such as Belgian, Czech, French, German, India, and others). Select a layout to apply it to the editor. The currently active layout is marked with Current layout |
| Current Layout Indicator | Displays the active keyboard layout in the status bar (for example, Layout: India). Click the indicator to quickly switch to a different keyboard layout |